Other Connectors
The eva NLP (NTT DATA proprietary Natural Language Processing engine) comes integrated as default.
In this chapter, you'll learn how to connect the virtual agent to an external NLP. In case you are using an externals NLP and want to move your virtual agent to the eva NLP, just select it on the NLP menu.
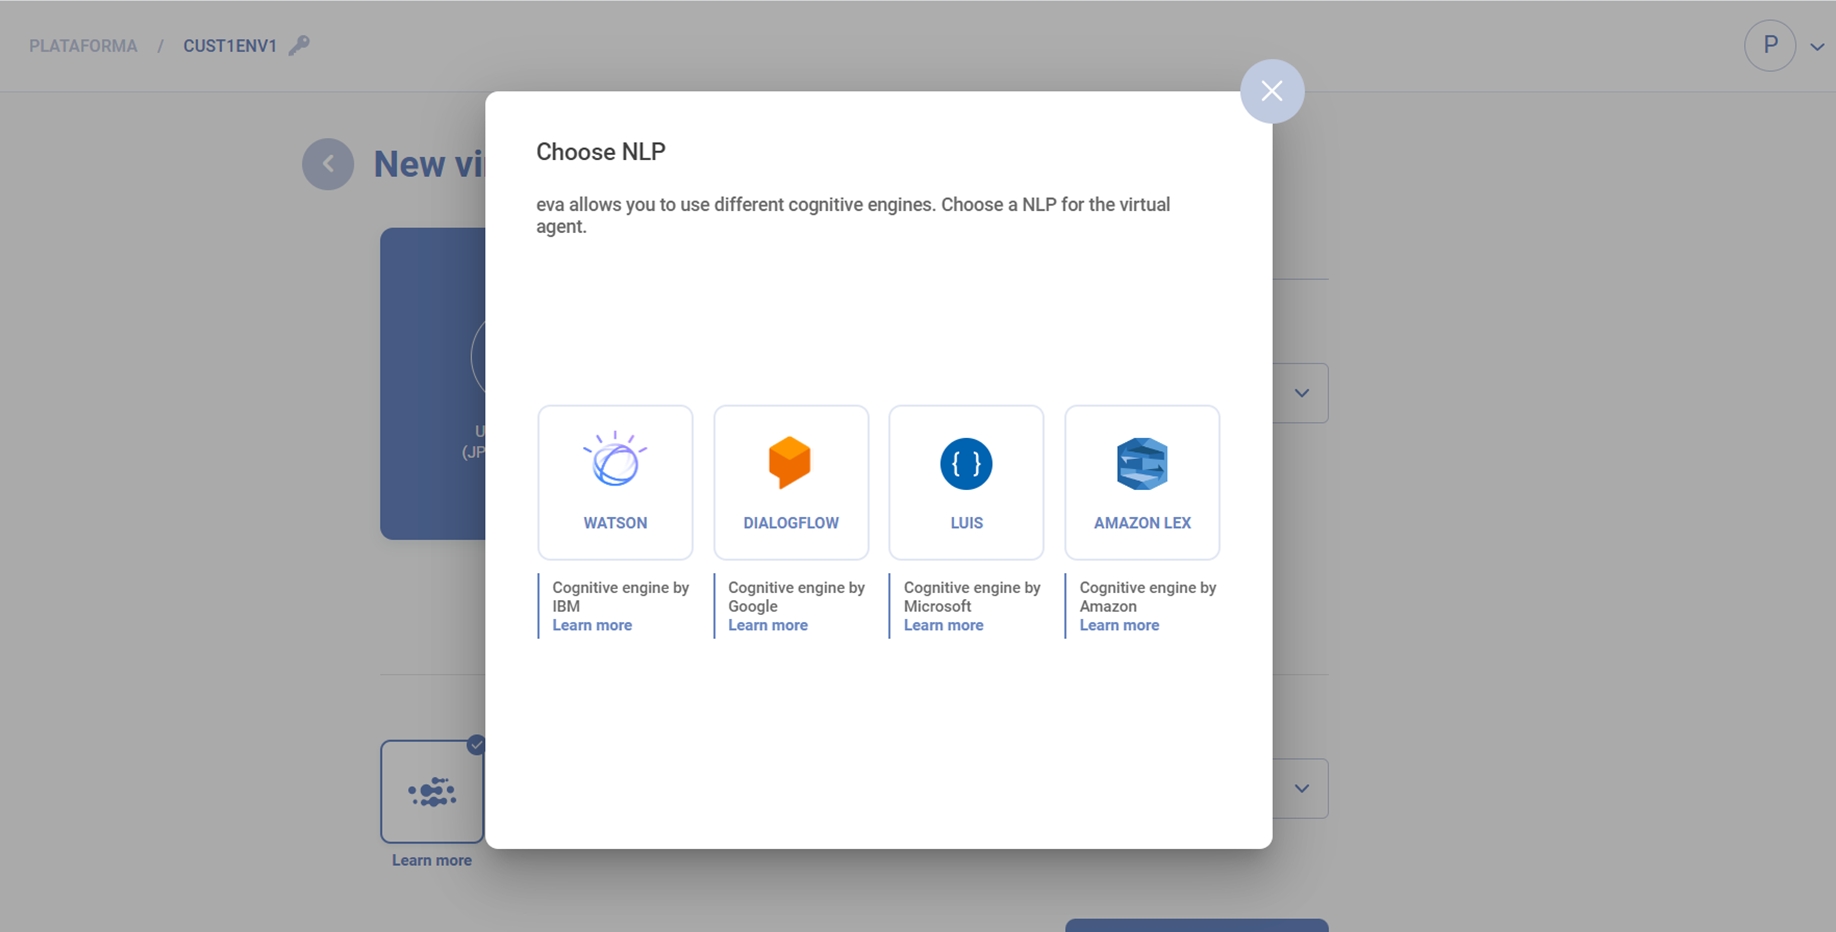
eva allows you to use different cognitive engines:
IBM Watson Assistant.
Google Dialogflow Essentials.
Microsoft Luis.
Amazon Lex
To use any of these, just follow this step by step.
Click on "Use another NLP" to open this window with the NLP options.
IBM Watson Assistant

Watson is a service package offered by IMB. Among them, there is a question-answering software that applies natural language processing, information retrieval, knowledge representation, automated reasoning and machine learning technologies to answer questions posed in natural language.
1) Go to https://login.ibm.com/
2) Log in with your IBMid
3) Click on "skills" in the upper left corner
4) Then click “create skill” to create a virtual agent on Watson
5) If you have existing skills, select one, then click on the menu in the upper right corner of the selected skill card.

6) Click on “view API details”
7) If you are using a newer account, copy the links and codes after Assistant URL and Api Key insert them on eva. Remember to switch to the newer version in eva.
8) If you are using an older account, copy the links and codes after v1 Workspace URL, Username and Password and insert them on eva. Remember to switch to the older version in eva.

Google Dialogflow Essentials

Dialogflow is a human-computer interaction framework that works on natural language.
1) Go to https://dialogflow.com/
2) Then click on “go to console”.
3) Click on settings on the upper left corner (the cogwheel icon - see image).
4) Click the link right after “Project ID”.
5) You will be taken to a page in the Google Cloud Platform.
6) Once in the Google Cloud Platform, click on the link below “e-mail”.
Important: Remember to charge your agent permission or else your intents won’t work
7) Go to IAM on the upper left corner of the menu (as shown in the image below).

8) Once there, click on the edit icon (pencil) on the right of the agent named as Dialogflow Integrations (see image below).

9) Now, select “Dialogflow” and then “Dialogflow API Admin” (as shown in the image below).

10) Once you changed your agent permission, go to “service accounts” and then click on the menu on the right of the agent you want to use.
Important: If you don’t have a Service Account, click on “Create Service Account” and create one

11) Click on “create key” and select JSON.
12) Save the JSON file on your computer.
13) (Optional) If you want to use a Dialogflow agent from a specific region, you need to modify the JSON file with a new parameter called Dialogflow.region. This parameter must contain the official region identifier described in this table:
Country grouping
Geographic location
Region ID
Europe
Belgium
europe-west1
Europe
London
europe-west2
Asia-Pacific
Sydney
australia-southeast1
Asia-Pacific
Tokyo
asia-northeast1
Global
Dialogflow delivery is global, data at rest is within the US
global
If this parameter does not exist when creating the bot in eva, the global region will continue to be used by default as it has been to date.
Example Dialogflow metadata JSON with “region” parameter:
{
  "type": "service_account",
  "project_id": "projectId",
  "private_key_id": "d8313783b67e14489ef0ea8b2fafd2b23c62c507",
  "private_key": "-----BEGIN PRIVATE KEY-----CRIPTED_KEY-----END PRIVATE KEY-----\n",
  "client_email": "email@ email.iam.gserviceaccount.com",
  "client_id": "1234",
  "auth_uri": "https://accounts.google.com/o/oauth2/auth",
  "token_uri": "https://oauth2.googleapis.com/token",
  "auth_provider_x509_cert_url": "https://www.googleapis.com/oauth2/v1/certs",
  "client_x509_cert_url": "https://www.googleapis.com/robot/v1/metadata/x509/...",

  # NEW PARAMETER --------------------------------
  "region": "australia-southeast1"
  # NEW PARAMETER --------------------------------
}
14. Upload this file when creating a Dialogflow virtual agent in eva to complete the integration.
Microsoft Luis

Language Understanding (LUIS) is a cloud-based API service that applies custom machine-learning intelligence to a user's conversational, natural language text to predict overall meaning, and pull out relevant, detailed information.
To integrate LUIS to eva, you have to have an active Azure account with created resources.
1) Go to luis.ai
2) Login with your Microsoft account.
3) Create an app or click on an existing one.
4) Click on “manage”.

5) Then click on “Azure Resources” at the left.

6) Copy the example query, located on the bottom of the screen.

7) Then, click on authoring resource and copy the primary key.

8) Paste the Example Query on the URL prediction field and the primary key on the authoring key field.

Using system entities in Luis
eva supports Luis version 2. When using the datetimeV2 system entity in Luis, you can use subcategories, such:
date
time
datetime
daterange
timerange
datetimerange
Those subcategories should be added after a dot (.).
So, if you are using the date subcategory, the entity name should be builtin.datetimeV2.date
Where builtin.datetimeV2 is the system entity name and date is the subcategory.
For further information, check https://docs.microsoft.com/en-us/azure/cognitive-services/luis/luis-reference-prebuilt-datetimev2?tabs=1-3%2C2-1%2C3-1%2C4-1%2C5-1%2C6-1#subtypes-of-datetimev2
Amazon Lex

You will be asked to provide some information on your request, as listed below:
1. Create a new user
AWS User and Password
Log in and access IAM in the AWS menu
Create a new user by clicking on Users on the Access Management menu
Fill in the required information (tip: try naming it with something obvious, such as eva-user).
Then, click on "Next: Permissions" and select "existing policies", enabling the "AmazonLexFull" policy.
Finish downloading this user and the CSV file.
This file contains all the data required to integrate eva to your AWS account.
2. Go back to Amazon Lex page
Access the Services menu to go back to the Amazon Lex page

Name
Then, proceed to the side menu to access the virtual agent you want to integrate. Click on the name to open this "Bot details" card. Copy the ID.

Alias
On the same side menu, choose "Implementation" and then "Aliases". Select the alias you want to use, then find the value on the fiel "ID" within "Details".

Region
There are two ways of finding out the region: the first is on your virtual agent URL.
One way is clicking on the top bar and find the selected region (as seen below).

The other way is through the URL, for example: “https://us-east-1.console.aws.amazon.com/lexv2/home?region=us-east-1#bot/YZ24GFVCSX”.
Note that it shows the region us-east-1.
Version
Now Select "Draft Version" and find the field "Version".

These are the information required to integrate Amazon Lex.
Last updated